Elevate Your Cooking with Roasted Garlic Compound Butter
Welcome to a culinary exploration where simplicity meets sophistication. Today, I’m excited to share a recipe that promises to elevate even the most ordinary dishes to extraordinary delights: Roasted Garlic Compound Butter. Perfect for food enthusiasts and home cooks looking to add a gourmet touch to their meals, this butter blend is not only versatile but also incredibly easy to make.
Who Should Try This Recipe?
Whether you’re a seasoned chef or a novice in the kitchen, this roasted garlic compound butter is for you. It’s especially great for those who love to impress with minimal effort. The rich flavor of roasted garlic combined with the creamy texture of butter creates a perfect finish for steaks, a delicious spread for artisan bread, or a transformative ingredient for sauces.
Why Roasted Garlic Compound Butter is a Must-Try
Imagine the aromatic, mellow sweetness of roasted garlic merged with the silky smoothness of butter. This compound butter adds depth and flavor to any dish, turning simple meals into memorable dining experiences. It’s not just a condiment; it’s a game-changer in the kitchen.
Ingredients and Kitchen Tools
Ingredients:
- 1 head of garlic, roasted
- 1 cup (2 sticks) unsalted butter, softened
- Salt, to taste
- Optional: Fresh herbs (such as thyme, rosemary, or parsley), finely chopped
Kitchen Equipment Needed:
- Aluminum foil (for roasting garlic)
- Small baking dish
- Mixing bowl
- Fork or potato masher
- Plastic wrap or parchment paper
Step-by-Step Directions to Culinary Bliss
- Roast the Garlic: Preheat your oven to 400°F (200°C). Cut the top off the head of garlic, drizzle with olive oil, and wrap it in aluminum foil. Place in a small baking dish and roast for about 35-40 minutes, or until the cloves are soft and golden. Allow to cool.
- Prepare the Butter: Squeeze the roasted garlic cloves out of their skins into a mixing bowl. Add the softened butter, and mash together with a fork until well combined. Season with salt and mix in any additional herbs if using.
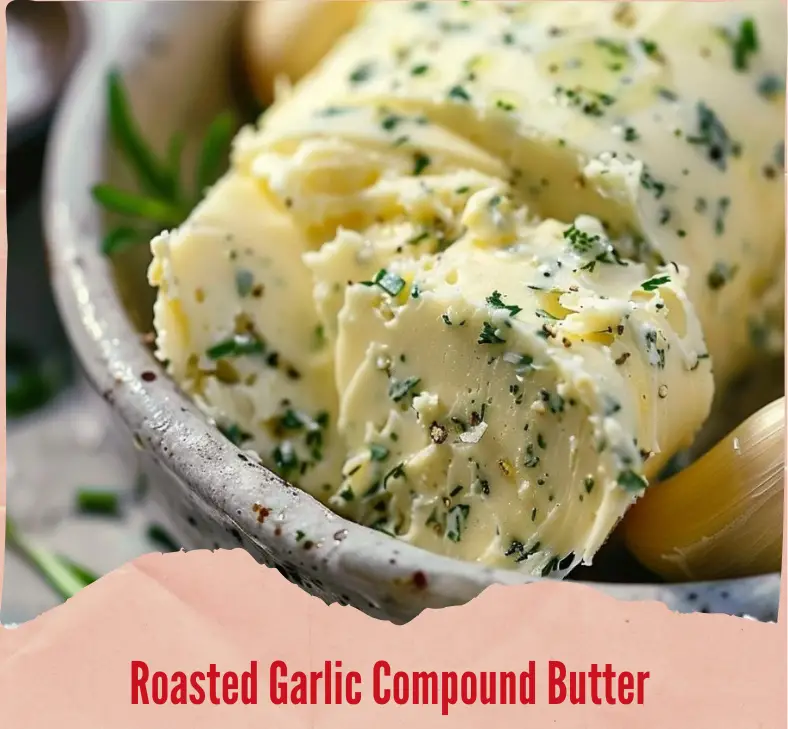
- Shape and Store: Lay a piece of plastic wrap or parchment paper on your counter. Scoop the garlic butter mixture onto the wrap, and form into a log using the edges of the wrap to shape it. Twist the ends closed and refrigerate until firm, about 2 hours.
Tips, Shortcuts, and Variations
- Shortcut: Use pre-roasted garlic available at some specialty stores to save time.
- Variation: Add different herbs or spices like black pepper, chili flakes, or even grated Parmesan to tailor the butter to your taste.
- Tip: Make a larger batch and freeze individual portions wrapped in foil for easy use anytime.
Storing Leftovers
Roasted garlic compound butter can be stored in the refrigerator for up to two weeks or in the freezer for up to three months. Ensure it’s wrapped tightly in plastic wrap or placed in an airtight container to maintain its flavor and freshness.
Suggested Pairings
This butter pairs beautifully with a robust red wine like Cabernet Sauvignon, which complements the rich, savory flavors of the garlic. Serve it melted over grilled steak, tossed with fresh pasta, or as a finishing touch on roasted vegetables.
Frequently Asked Questions
Q: Can I use salted butter instead? A: Absolutely! Just omit any additional salt from the recipe to balance the flavors.
Q: What’s the best way to roast garlic? A: Roasting garlic is simple. Just cut the top off the garlic head, drizzle with olive oil, and roast as directed above. The key is allowing it to cook slowly to develop its sweet, nutty flavor.
Q: Can this butter be used as a base for other sauces? A: Yes! It’s excellent as a base for creamy pasta sauces or even for enhancing the flavor of homemade gravies.
Ready to Transform Your Dishes?
Now that you know how to make roasted garlic compound butter, I encourage you to try this simple yet transformative recipe. Share your creations and experiences, and don’t forget to subscribe to our blog for more culinary tips and tricks. Happy cooking!